Wicking Bed 2.0
By Raymond Jess
Editor’s note: Check out our podcast interview with Raymond here, and read his first wicking bed article here.
The influence behind the ingenuity…
Two factors influenced the development of this version of a wicking bed. The first factor was using an existing raised bed garden tended to in the traditional manner. The second factor was moving closer to the original idea of a wicking bed.
Since my previous article on building a wicking bed, I have read almost everything I can get my hands on regarding the subject. Most of the information is similar to what I did when building my own beds. I found some articles written by Colin Austin (the father of the wicking bed concept) and learned more about his concept of a proper wicking bed. In his original writings, he proposes a base of plastic then weeds covered directly by planting medium. This was the first model of the wicking bed he built in Africa. His concept has progressed from that first model to a beautiful garden we can build, love, enjoy and care for in our favorite space.
A dear friend of mine wanted a raised garden bed in her new home; this would be her first adventure into gardening. She planned the dimensions, determined the building materials and purchased the best planting medium available. We spent a few hours building and filling the bed and she was very pleased with the finished product. With excitement, she planted the first transplants, knowing they would develop into strong healthy plants which would feed her family and neighbors. As time passed, she became dissatisfied with the results of her effort as the plants were not developing to her expectation.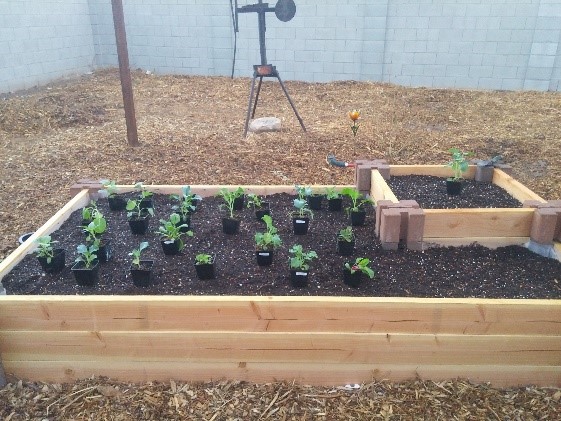
When she visited my home, we would sit looking out the kitchen window gazing at how luscious and diverse the plants looked in the wicking beds. With excitement, I would share with her the bounty of my garden. After a few visits, she decided she wanted to convert her garden to a wicking bed and asked if it could be done. I had been planning to build a third wicking bed in my back yard using perforated drain pipe for the reservoir and planting medium. Her desire to change her existing garden was a perfect time and place to try my revised idea of a wicking bed. After a bit of discussion, she agreed to convert her existing garden into a wicking bed using this different idea.
We removed and potted the plants which looked good and proceeded to remove the planting medium already in the garden bed since it could be used again. We laid down a layer of soil, leveled it and then covered it with cloth to be sure nothing would puncture the liner before we installed the pond liner.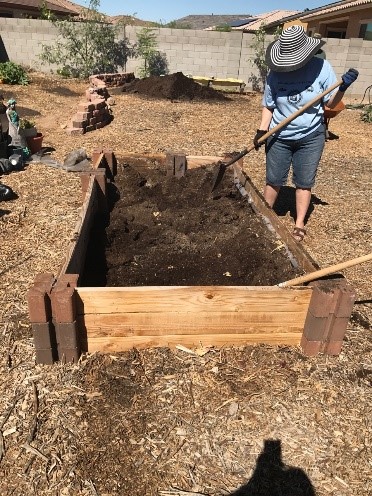
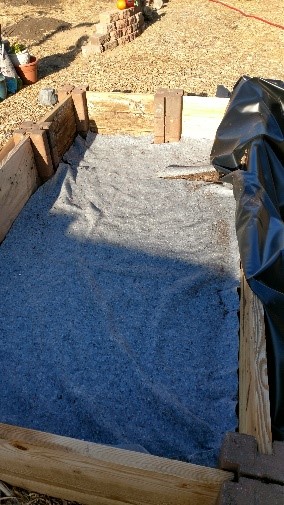
Once the pond liner was in place we drilled a hole and installed the bulkhead fitting, 90° elbow and 3inch length of clear tubing which would serve as both the overflow and water sight level. I told her the clear plastic tubing could be replaced with a longer piece if she was not getting enough water to her plants. The length of the clear tubing determines the water level in the reservoir. We then installed 4-inch diameter by 10-foot perforated drain tubing sections and sealed one end with duct tape to the bulkhead fitting and raised the other end above the bed as a fill tube. We did a leak test before filling the bed with planting medium.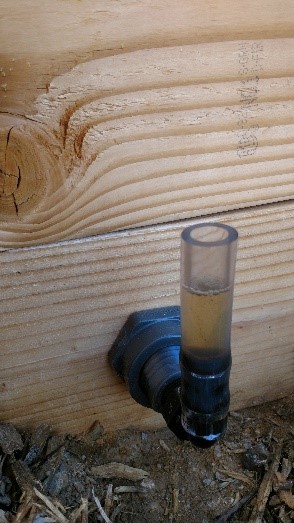
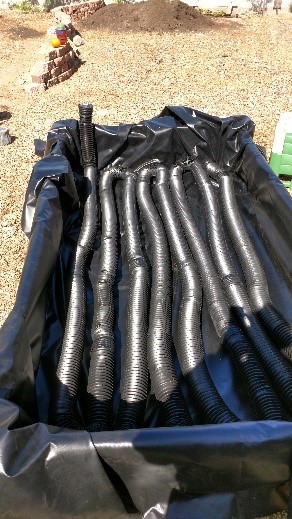
The reason for moving to this system instead of the rock and shade cloth barrier for the reservoir is to allow the deep rooting plants such as tomatoes, carrots, radishes and others direct access to the reservoir. One thing to keep in mind; it is the root system of plants which are a main water mover in a wicking bed. As the water moves up because of the deep-rooted plants, it is also moves to the shallower rooted plants. Intersperse plants with shallow root systems between those with a longer root system It is a win-win situation.
We partially filled the bed before putting on the furring strips so there would be no slippage of the pond liner.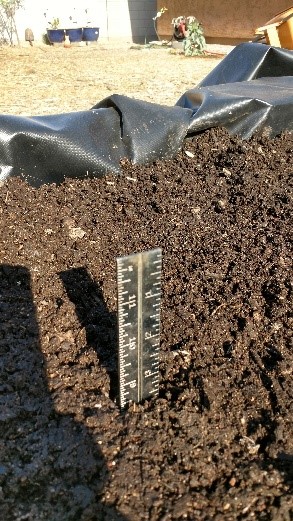
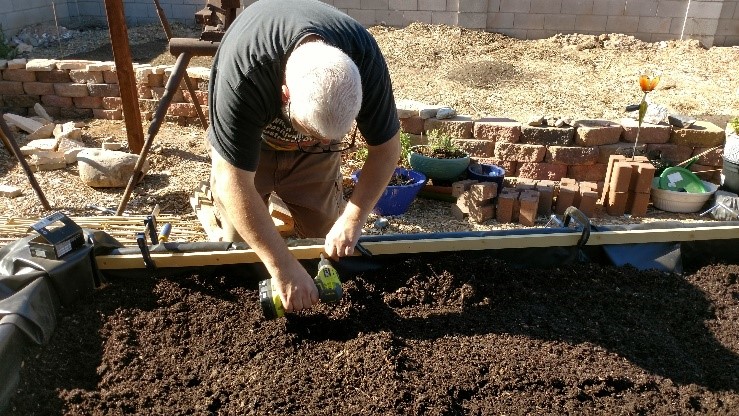
We finished filling the bed with pre-moistened planting medium (premium potting soil) which makes this a soilless garden bed. The reason for not using any “soil” is, soil holds too much moisture which will not allow the plant roots to breath. It is that void space in the planting medium which allows the plants to make a gas exchange. We added some vermiculite to the mix to increase the void space in the planting medium. In addition to the vermiculite we added a little extra compost (macro elements) since the soil was previously used, AZOMITE (trace elements) and Mycorrhizal (beneficial fungi for the root system). The next step was to trim the excess pond liner.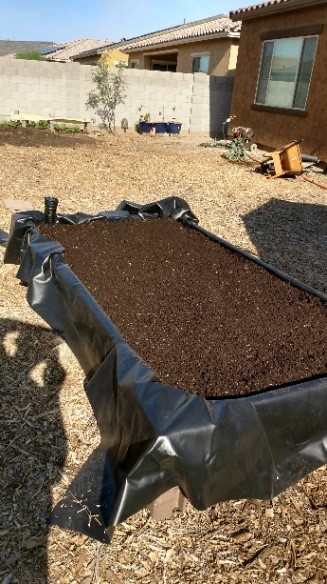

I have tried to talk my friend into putting a worm bed into her garden but she is not ready for that yet. Worms, besides providing casting which are a phenomenal organic fertilizer, bore throughout the bed providing additional space for air and water movement. Burying small amounts of raw compost throughout the bed also increases the void space.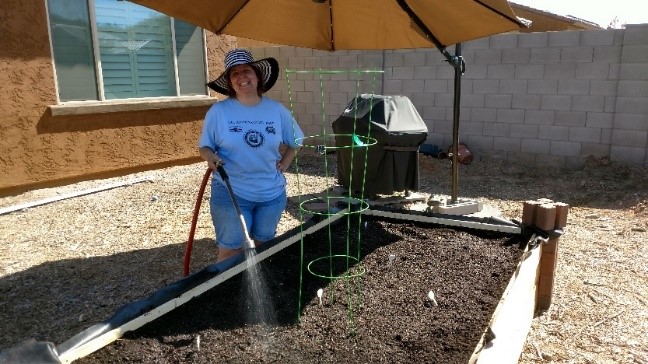
The finishing step would have been to put on the top molding. But it was hot that day and my friend was anxious to put seeds in her new garden so we put that step off another day. When planting seeds directly in a wicking bed one must “moisten” the top of the planting medium frequently until the plants becomes established. It is the nature of a wicking bed to be dryer on top and moist underneath. Moisten does not mean soak the top as soaking will move your nutrients into the reservoir and potentially make the reservoir putrid. If your reservoir does become foul smelling, drain the reservoir and leave it open overnight then refill in the morning. It sounds strange but don’t be too kind to your wicking bed. Kindness can lead to over watering and problems down the road.
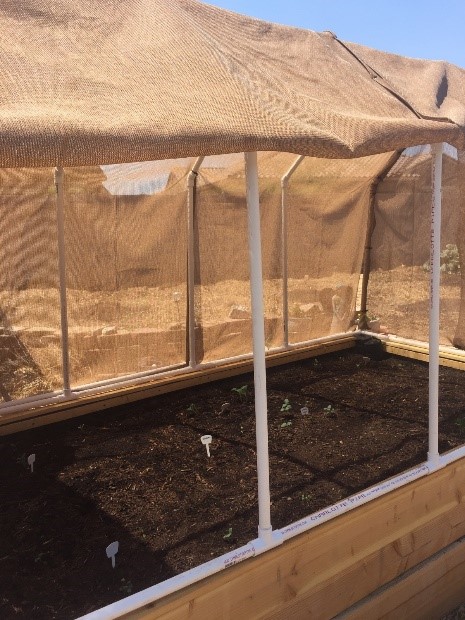
It has been a little over a month since we upgraded her garden. In the meantime, she has built a shade cover for the garden because the Phoenix summers are brutal. A majority of the seeds she planted have grown and become established. She is now pleased with the effort she has put into her garden and the plants are living up to her expectations. The bottom line is that she was willing to try something different and it has paid off so far. We made the change a little over a month ago so, we will continue to observe the progress of her garden bed.
Want to learn more about Raymond or wicking beds?
He was our featured farmer for April 2017!
Read our Q&A with him here.
Listen to Raymond on The Urban Farm Podcast
Wicking Bed Articles:
Building my wicking garden bed (Wicking bed 1.0)
Wicking bed 3.0
Want to be featured? Reach out to Janis@Urbanfarm.org.
I love your website and the detail you go into. I want to build several wicking garden beds for my wife but I have a perplexing question about them that has haunted me and I cannot seem to find the answer. I have a question about the capillary action of the water through the media. 6-9 inches of gravel with an overflow pipe at the top, then geo textile fabric, then soil…. with the overflow (or really even without the overflow) the water never really contacts the geo fabric or it only does for a short period of time, then you’d have a slight air gap in between the actual water level and the geo fabric and soil, how then does the water reach the soil? Is the capillary action somewhat related to an evaporation process? If the water level drops after the initial absorption, how does the rest of the water wick upward?